onsdag den 11. november 2015

Arch Linux on the Orange Pi .. I like it


So about a month ago i ordered an Orange Pi development board. At the time it was $12 + shipping from mainland China. And i just got it a few days ago. I have been buying up used Raspberry Pi's for the past year hoping to build a cluster at some point, and i have several boards in use for various projects and media centers at home.

The Orange Pi had a low price. 1024 MB RAM and a Allwinner Quad Core 1.6GHz CPU. For $12 that is a steal. The fact that it sports a Allwinner CPU, this device will at best deliver partial hardware accelerated video playback using the CedarX multimedia library, and i have no idea if it is supported or not. For my use i couldn't care less about video playback. I had been eyeing the RPi2 for the specifications to use for a few more demanding tasks that needed the boost in specification.

The documentation for the boards is really bad, and the instructions to get a board up and running is actually so bad the if you follow them, you will not end up with a board running anything.

I was planning to use the Debian image for the board, but when i spotted an Arch Linux image just above the Debian one, i was sold. I love the efficiency of Arch and the AUR, and as a long time Arch user, i was aboard. After running $ dd to write the image to my SD card, i was left with a prebuild Arch install and a BOOT directory containing kernels and resolution scripts that i had to further narrow down to fit the device i got.

After that, i spend about an hour setting up the yaourt package manager, that was a bit more tricky to do on the ARM7 platform than it is on my x86 devices.

First of all. When adding the yaourt repository to /etc/pacman.conf i usually add this:

[archlinuxfr]
SigLevel = Never
Server = http://repo.archlinux.fr/$arch
However. For the arm platform i added:
[archlinuxfr]
SigLevel = Never
Server = http://repo.archlinux.fr/arm

After that i manually downloaded and build both the yaourt package and the package-query package it has among it's dependencies.

package-query and then yaourt:

$ wget https://aur.archlinux.org/cgit/aur.git/snapshot/package-query.tar.gz
$ tar xfz package-query.tar.gz
$ cd package-query  &&  makepkg
$ sudo pacman -U package-query*.pkg.tar.xz  
$ wget https://aur.archlinux.org/cgit/aur.git/snapshot/yaourt.tar.gz
$ tar xzf yaourt.tar.gz
$ cd yaourt  &&  makepkg 


And Finally:


$ sudo pacman -U yaourt*.pkg.tar.xz

onsdag den 26. august 2015

Adding the Arch Assault repo to pacman.conf


After getting gpg related errors when trying to add the Arch Assault repository to my pacman.conf i came upon this solution.

the error message read:

gpg: keyserver receive failed: No dirmngr

So it was a missing directory. And a gpg directory non the less.

Searching the mighty interwebs i came upon a gpg mailing list mentioning bug in which the dirmngr was not being created for the root user in the arch linux architecture for obvious reasons.

But there seems to be conflicting arguments whether the bug is related to gpg or to arch linux itself, since that the root user in arch should not have to have a .gnupg dir, but never the less needs one for certain operations.

So. As root create the directory:

dirmngr </dev/null

Afterwards, still as root. You can now add the repo to pacman.conf and the arch assault keys with --noconfirm (safe right?):

echo "[archassault]" >> /etc/pacman.conf && \ echo "Server = http://repo.archassault.org/archassault/\$repo/os/\$arch" >> /etc/pacman.conf && \ pacman-key -r CC1D2606 && \ pacman-key --lsign CC1D2606 && \ pacman -Sy --noconfirm archassault-keyring archassault-mirrorlist


onsdag den 1. juli 2015

why VIM uses "h,j,k,l" for navigation

The UNIX equivalent to race wars can be found in terminal text editors. And even though i have been using both nano and VIM for a fair amount of time, it was not until today that i actually learned that the navigation keys in VIM of h,j,k,l was not implemented to create some sort of hipster elite, but rather it came to be due to the fact that VIM used the keyboard layout from the "ADM-3A" terminal that had secondary arrow keys mapped to the h,j,k,l keys.


mandag den 9. marts 2015

makepkg 4.2 killed --asroot.

A dirty fix that works from the yaourt github thread.
Edit /usr/bin/makepkg
Add asroot to OPT_LONG (line 3366). 
Search for "OPT_LONG".
OPT_LONG=('allsource' 'check' 'clean' 'cleanbuild' 'config:' 'force' 'geninteg'
          'help' 'holdver' 'ignorearch' 'install' 'key:' 'log' 'noarchive' 'nobuild'
          'nocolor' 'nocheck' 'nodeps' 'noextract' 'noprepare' 'nosign' 'pkg:' 'repackage'
          'rmdeps' 'sign' 'skipchecksums' 'skipinteg' 'skippgpcheck' 'source' 'syncdeps'
          'verifysource' 'version' 'asroot')
Remove EUID check (line 3577).
Search for "EUID".
if (( ! INFAKEROOT )); then
    if (( EUID == 0 )); then
        #error "$(gettext "Running %s as root is not allowed as it can cause permanent,\n\
#catastrophic damage to your system.")" "makepkg"
        #exit 1 # $E_USER_ABORT
        plain "$(gettext "Running as root restored by Orc ;)")"
    fi

 This dirty fix helped me install snort on my pi once again. Remember running makepkg as root will make baby jesus cry.

søndag den 1. marts 2015

Archbang login manager

Now i am in no way fluent in linux, but i have been using it for years, and i want to start writing down the solution to some of the problems i encounter during my usage. I may embarrass myself with how i frame the problem, but i will at least include a solution that has worked for me.

Now. Punching the Arch philosophy in the face, i choose to skip a few steps from time to time, and install Arch Bang, instead of pure Arch. Now calm yourself down. i have installed Arch from scratch several times, so i know exactly what it is i want to skip over if i need to save some time in order to get a fully functional system. 

So i just spend some time to figure out how to kill off the login manager that came with Archbang. That will teach me not to control every aspect of the install.

Now the Arch Bang Wiki is not the Arch Wiki, which is close to being the most thorough and well written guide i have ever encountered. It is close, since the end result of installing Arch Bang is Arch, but looking at the package list of Arch Bang the login manager looks to be Slim.


Searching my system i could not find a single reference to Slim. It took me way to long to think about taking a look at the systemd processes enabled on my system, but running the following command listed every enabled process.

systemctl list-units -t service --all

This command revealed that the login manager was in fact "lxdm"

Good times. Now i can disable the process by running:

systemctl disable lxdm

And there was much rejoicing ..


tirsdag den 30. december 2014

Launching applications using a certain theme on Arch

So i have been busy with midterm exams and basically just not writing anything somewhat related down. i have abandoned Windows on everything but my mid spec gaming rig, but with steam os in the making, i am hoping to ditch windows soon enough.

That have left me distro hopping all around, but i keep coming back to Linux Mint since 15 and up to 17.1, i'm on debian and ubuntu for my servers, and switched over to Arch Linux on my laptop a few months back. Talk about a distribution that will force you to learn, patch and learn some more about your system.

I have been meaning to write down a few things here, mainly to remind myself somewhere down the line if i run into the same problem.

One thing i have found helpful as a workaround for problems with customizing my own OS themes, and having applications break from GTK errors and the like, is launching a program using a specific theme. In my case i have used the Adwaita theme, for it's basic allround functionality.

So to run a custom command launching a program using the Adwaita theme i do:

GTK2_RC_FILES=/usr/share/themes/Adwaita/gtk-2.0/gtkrc agave
where "agave" is my application name to be replaced with whatever you want to launch.

For launching a application using its gtk3 theme simple structure the command as such:

GTK_THEME=Adwaita agave


edit: you need to include a export statement to your bashrc

export GTK_PATH="$GTK_PATH:/usr/share/themes/"

fredag den 31. oktober 2014

Fixing the glibc 2.14 'not found " error in Wheezy


Now i know that other people have had this problem with other applications and i honestly don't know if this way of fixing it will work for those applications, but in theory it should.

I encountered the error message after Bitcasa updated their Linux headless client, without notifying any users that they did.

They now include a "bitcasa2" package in their repository. i wanted to mount my Bitcasa drive on my server to setup Rsync using SSH to backup my files. My server is running Debian Wheezy and threw the error of the missing glibc 2.14 library at me when i tried to mount my Bitcasa drive.

I had to spend quite some time on solving the issue so i thought that i would share my solution.

First thing i did was to add experimental builds to my sources.list:

nano /etc/apt/sources.list

Then added:

deb http://ftp.debian.org/debian experimental main
deb http://ftp.debian.org/debian sid main


I then ran and update and installed "libc6-dev":


apt-get update
apt-get -t experimental install libc6-dev

Once done, check the version:


/lib/x86_64-linux-gnu/libc.so.6

That was it for me. I could then run Bitcasa with the latest Bitcasa2 addition.


søndag den 7. september 2014

Finally found a useful fanless device that is affordable. The Cubox-i2 eX from SolidRun

At this point i have have been using XBMC for some years now, and i have been through countless devices looking for a device that could fulfill my fairly simple media center needs.


As my main device i have been using a aging Acer Revo R3600 with OPENELEC. Nothing has been able to beat that. But i have been looking. My problem was the fan, it was fairly loud and would sometimes drown out the audio from whatever i was watching if the volume was turned down. It did work like a charm. During the past years i have been trying out a lot of different devices trying to find a device that would offer the usage experience of my low end Acer Revo, but be without the fan and enough low power to be on all the time.

My first purchase was the REF16 Smart TV box, that was some obscure chinese product sporting AMLogic M3, 1 GB RAM and a 1.2 GHz CPU. I purchased on of these boxes due to a breakthrough one of the XBMC devs had in getting hardware accelerated video playback working on the AMLogic M3 platform. it worked, and still does actually, works great. All development for it has stopped though leaving it unsupported and on a Beta 2 version of XBMC 12.

My next attempt was to setup one of my Raspberry Pi’s with the OPENELEC build, and it is what is still in use now. Rock solid, stable, best developed XBMC distro for the Pi. The UI is a bit slow, and not due to the OPENELEC build, but simply due to the limitations of the RPi specifications. Loading remote content takes a while and navigating is obviously slower than on a higher specification platform.

My next purchase was the Odroid U3 from Hardkernel that offers an amazing 1.7GHz Quad-Core Processor and 2 GB RAM. From what i understand a lot of people are using the devices from Hardkernel without problems, i had trouble finding a usable power plug that seemed to differ from the specifications they mentioned on the info sheet, that ended up taking me almost 4 weeks finding a plug i could use. I used a high end class 10 micro SD card for running OS’s, Micro SD cards that clocked in at 30 Mb/s on a PC and ran everything from other operating systems on other platforms to general speedy usage on phones and tablets, on the Odroid however every point of navigation in every single OS i tried out resulted in a wait of anywhere in between 5 to 20 seconds rendering the device utterly useless. Playback was fairly flawless with 1080p streaming from LAN server on Android 4.2 with libstagefright rendering, but was unable to stream anything beyond 720p on Debian Wheezy or any other Linux based distribution i tried.

I sold my Odroid U3 and when i read on the OPENELEC blog that support was coming for the Cubox-i devices, i opt in and purchased a Cubox-i2 eX from SolidRun, with a dual core 1 GHz CPU and 1 GB RAM. It arrived about 10 days ago, and i set it up with Kodi 14.0 “Helix” alpha 2. Navigating the user interface works flawlessly without delay, even when accessing remote content. It has passed all my usual tests with 1080p files and at this point it has not been restarted a single time and have not thrown a single error at me. It completely matches up to the usage experience, stability and supportability of the x86 experience. And in a few places of navigating XBMC/Kodi it surpasses my Acer Revo computer.

If it is the optimized version of Kodi or better hardware alone i have no idea. But the device is nothing short of amazing, and with support of OPENELEC it falls into the high end category of low price devices that offers a hardware accelerated media experience with great support and development. The device offers a 10/100/1000 Mbps ethernet connection for an actual speedy connection, HDMI 1080p with CEC controls, (although i don’t think CEC is working in the alpha build) and it even offers support for 3D if someone actual is odd enough to enjoy that.

It is powered by 5V meaning that it could be powered by the USB slot on my TV. I am looking forward to trying out the CEC functions, but even at this point it beats every other low priced device i have ever tried out. 

søndag den 24. august 2014

Odroid U3

So I was hoping to get a new media center device that had just a bit more power than my raspberry pi and did not have a fan like my aging Acer Revo 3600. So I decided on the Odroid U3 from Hardkernel.

The device shipped from South Korea and I sadly ended up paying the same amount in taxes and fees that I had originally payed for the device itself. In my rush I had not learned that the U3 is NOT USB powered like the raspberry pi is, so I had not chosen to buy a power supply along with it. Big mistake.

The power plug size listed seemed fairly standard, it did however take me 3 weeks to track down the right size as the size listed in the specifications is not that standard around here.

I then threw Debian wheezy on a class 10 micro SD card, and that let me run a Xbmc build that could play back up to 720p without to much trouble. I did get some constant UI freezes that made the simple fact of using the device pretty horrible. I sprung for a micro SD card twice the price but still class 10, as I have before had problems with SD cards claiming to be high quality being.. Well anything but.

Same problem with UI freezing up and me having to wait anywhere from 5 to 20 seconds before the U3 became responsive again. I then tried out a Android jelly bean build that let me boot straight into a full screen, libstagefright supported xbmc version that could playback 1080p, with a bit of lag here and there. And what was worse. The same UI freezing persisted. When I asked around the hardkernel community, I was told that the devices could not really run OS from micro SD and that I should purchase a emmc memory module to use for the OS.

I have been running anything from servers to flawless xbmc versions from sd and flash memory so I was not about to purchase anything like that. My RPi runs without the UI freezing up from the very same micro SD. And the Odroid U3 sports a 1.7GHz Quad-Core processor and 2GB Ram so I am really surprised it was such a poor experience for me. I have no idea if it was a faulty device or something similar. But I sold it again.

And are now awaiting the arrival of a Cubox-i2eX that sports slightly lower specifications but has support for OPENELEC xbmc builds, that imo is the bees knees if you need a device for media playback only. My experience is that the stable builds are beyond rock solid and by far the most amazing builds out there.

fredag den 11. april 2014

upgraded my server. awesomeness followed


So i was getting a bit tired of my two aging NAS servers was fighting me every bit of the way, when ever i wanted to use them for something else than what the manufacturers intended, so i upgraded to a HP Proliant Microserver N40L that could contain the 4 drives from my Netgear Duo and Zyxel NSA 320.

Right away i installed plain Debian headless, and at this point i have finally been able to make a setup to sooth my needs without having to dig through german forums hoping that google translate would not trick me into running commands that would screw up a installation.

Owncloud, Plex, SMB shares, Bittorrent Sync, SubSonic SSH tunneling, vsftpd server. I am living the dream here, and in the process learning a lot that is not restricted to one single model of one simple tweak for some store brand NAS server. Here is a platform that lets me use my simple knowledge of Linux, while learning so many awesome things in the process that i can also use in other parts of my digital life, from my Linux Mint Laptop, to general database structure for programming.

Next up is a LAMP install to run projects from, and setting up SNORT. Good times. 

onsdag den 8. januar 2014

Using a Raspberry Pi as a medium between external server and local NAS, using Bittorrent Sync


So i managed to sell my server build in bits and pieces. And for the money i purchased a 2 bay Zyxel NSA320, despite having an unfortunate name, it is a small form factor standard NAS. 1.2 GHz processor and 512 MB RAM. It is close to official with support for the Fonz Fun Plug, and if using from USB stick it is fairly fool proof as the NAS OS is left untouched, unless you want to kill it. The NAS is pretty loud and as far as i can tell there is no way, system wise, to lower the RPM's. S.M.A.R.T. spins the drives down, but the chassis main fan spins at full speed no matter what. I took it apart and it looks like control of the fan has been disabled by hardware. Next to the fan plug is what looks like a controlled fan mount, but soldering on this device based on a theory is further than i am willing to go at this point. Instead i bought a Fan Mate 2 physical resistance controller, that i have yet to install.

#Update. The Fan Mate can be installed but have no effect what so ever on the fan.


First thing i did was to throw the ARM build of Bittorrent Sync on it to sync it up with my remote server, and it was up and running within 15 minutes. After a reboot, btsync was nowhere to be found. And i had made sure i placed it in the permanent storage. Btsync would run and be forked to the background, but gui was unresponsive no matter what. I cleaned out every bit of btsync from .sync to license.txt but no matter what, a install would work, but gui would not. i then tried a manual install by compiling every bit of btsync to try to change the listening port as some users had reported 100% cpu use and unresponsive gui from using port 8888. In my case it did not work. Btsync still runs, but gui remained unreachable from any browser.


Now btsync is actually fairly easy to set up using the bash command line and since it really only needs to be set up very rarely it would be pretty straight forward. I however choose to utilize a Raspberry Pi, that had been sitting on a shelf since i upgraded my media player. I flashed Raspbian on a 8 GB SD card, and to keep from plugging in a HDMI monitor and controllers i used SSH to login to the RPi using the default "pi" and "raspberry" credentials and then run


# sudo apt-get install tightvncserver

# tightvncserver


That gave me a headless control of the RPi using the tightvnc application. From my Windows 8 computer i then ran the tightvnc viewer and connected to the IP. In a quick and dirty move in the /home/ directory i ran


# wget http://btsync.s3-website-us-east-1.amazonaws.com/btsync_arm.tar.gz

# sudo tar -xzf btsync_arm.tar.gz

# sudo rm btsync_arm.tar.gz

# sudo ./btsync


That worked straight away. All i had to do now was mount the NAS cifs share as a drive for btsync to download to. in /mnt/ i created a directory


# sudo mkdir nas320


the cifs utilities should come with most distros, but if needed run


# Sudo apt-get install cifs-utils


I then navigated to the /etc/ directory and ran a command to edit the fstab file


# sudo nano fstab


Below the proc, boot and main partition i added a referal to my NAS cifs share:

(keep in mind the following is on the same line in the same tabbed formatting that the already existing drives are)


# //192.168.1.88/sync/video

# /mnt/nas320

# cifs

# credentials=username=your_username,password=your_password,iocharset=utf8

# 0

# 0


Now this is a pretty dirty and unsafe way to do things. For a bit more security i would recommend creating a .smbcredentials file using


# sudo touch .smbcredentials


Where you want to keep the file. This would mean you would have to change the credential part of the line you added in the /etc/fstab file.


instead you would now add


# credentials=/path/to/.smbcredentials,iocharset=utf8


This makes makes the mount persistent and will be mounted upon reboot.

I still need to manually start up btsync, but adding the auto run script is fairly easy, but must wait a few days.


fredag den 20. december 2013

Hackintosh OS X Mavericks on the ASUS N76VM


So after i got a gaming orientated desktop, i decided to try out putting OS X on my ASUS N76VM Laptop, since the internals are Intel it makes it easier than on a AMD based system.

After reading a bit, but not enough, i decided to just go for it since i found a way that seemed to good to be true. Usually with these things i prefer, maybe not the hardest way, but atleast a method that teaches me something along the way. This way did not provide me with that. Well, in a way it did, but not on a system level, not yet anyway. Basically the method used is to use a restore a OS X image to a partition on your HDD. I did. Got 3 read errors but it continued without a problem, i rebooted, and i booted straight to the setup for OS X. 

My first problem was internet connectivity. The WIFI card in the ASUS N76VM is not supported in OS X, meaning it will not work. Some people have worked around this by removing the internal wifi card and installing a supported Atheros card. i thought this step was a bit much for my usage at this point where i want to dual boot windows 8.1 and OS X Mavericks, so instead i used a EOUP 802.11n tiny wifi dongle i had, and after installing the drivers, it worked, but i did encounter some drops in speed to a point that made it useless. 

So at this point most thing works really well. Stable system, USB works, function key works with volume brightness and shortcuts. 

My main problems are at this point:

No dual boot. OS X works, but my windows partition is not working. When booting it shows HD1 to HD4 with HD4 being my OS X /D: partition. And HD1 + HD2 should be Windows 8.1. When i try to boot it, one will try to boot into what looks like Windows 7 with 800x600 resolution, but it then fails at boot and restarts. HD2 just gives me a critical windows error. 

That is what i am working on now. 

Also. Touchpad is bonked. Really bonked. useless. i have found a workaround but my main focus is getting to dual boot at the moment.


In an attempt to easier install kext files to fix my minor issues, i installed the Tony Mac x86 MultiBeast and KextBeast. in MultiBeast i noticed a function that would inform me of recommended tweaks to install. And i made the mistake apply the recommendations. The OS X partition now boots into a black screen. i do have sound so most likely it is a monitor problem. However, as i choose to have it installed manually with a bunch of other tweaks, i have no idea of how to revert the error. So now. No Windows and no OS X.

No extra Kext messing around is needed as the image being "installed"/restored is already set up. i always keep a USB drive with Xubuntu installed on it to solve boot issues, partition management etc, and running boot-repair with the recommended repair option, usually solves boot issues.

______________________________

Update: i had to reinstall everything, since i was unable to work out any solution in either windows, Ubuntu or os x to fix the boot loader. Now i am not saying it couldn't be done. I just grew impatient and reinstalled windows. Bought a dirt cheap 80 GB 2.5" HDD to fill the second slot in the N76VM.

I gave me a chance to work on my digital forensics skills as well, as i bought the HDD used. If you are ever to sell a hard drive that you have used. Make sure you

$ shred -z -u -n200 /dev/sda1 that puppy.

Especially if you have kept nude pictures of you and wife on it. Now i am a good guy, so everything i found was deleted.

I then dedicated the drive to os x, and used R-Drive in windows to write the OS X 50 GB Mavericks image to the drive. And have a fully working install. Well. No wifi since the card is not supported, but it works just fine with a wifi dongle.

Touchpad was actually working just fine all along. Turns out that it just gets confused when a external mouse is attached at the same time. Same problem exists in windows.

So all in all. If i had started out just using a second drive. A fully working OS X install could have been made in less than a half hour.

The bootloader is the text based chameleon bootloader, and i have yet to find the time to solve that issue, as my few attempts to change the bootloader has resulted in a OS X drive returning a black screen on boot.

I will add a link to the Mavericks image file soon, as the yandex link is painfully slow.

#Update. Here is a link to the .arc image file

To bad i didn't write a decent guide. I exchanged OS X for Linux Mint, but after shifting Mint to my main drive in the laptop, and having problems finding a useful way to make music in Mint that is not rendered useless by latency problems, i once again wished to write the Maverick image to my 80 GB. But so far. Every attempt has resolved in stuttering, flickering and freezing on every boot after the first one. So i am now trying to reverse the oh-so simple process of getting it to work.


onsdag den 18. december 2013

Bittorrent Sync helped me out.

So i changed my direction a bit as a i wanted a working setup while making a direct transfer configuration.

i therefore ended up using Bittorrent Sync to sync from a seedbox to my NAS server, and then used rsync to further copy the btsync to a different folder. This level of automation leaves me to just clear out files from serverside and on the NAS once in a while. So it is not a total automation. But i can live with that. Furthermore the setup i am using has torrent interception so for most sites i don't need to first download torrent to add to my seedbox torrent client, rather it intercepts it from the .torrent extension and adds it directly.

While this is working wonders at the moment. My next step will probably be to dive into usenet or to set up the encryption for downloading directly to the NAS. i have grown a bit tired of my NAS build though. i can't blame Nas4Free as it is more than awesome software and it works wonders. However my NAS needs are at this point way below what i feel N4F would be most useful for. Meaning constant spinning CPU and PSU fans for no usage is bothering me. i am now trying to sell my mobo, ram and cpu and acquire some D-Link 2 bay NAS with support for fun_plug instead. 

lørdag den 21. september 2013

Debian on the OUYA. Linux Based XBMC build not far away.

"The idea is not to touch Ouya’s Android at all. Kernel is booted from RAM and Debian from an SD card or USB stick.
The instructions for debootstrapping your own Debian Wheezy rootfs are described in the github repository and the needed binaries are in a temporary location that will probably change at some point.
WiFi is working as well but I’m not sure if the firmware binaries are redistributable, so you need to copy them from the Android rootfs after booting to Debian.
One of my main goals for this whole exercise is video encoding and I’m happy to say that H264 encoding from an USB webcam works nicely with hardware acceleration as well.
I’ve also noticed some issues:
  • Hciconfig doesn’t show BT devices, I didn’t debug much further.
  • Mpg123 seems to play but nothing is heard. Maybe it tries to pass MP3 onwards instead of PCM? GStreamer provides acceleration for MP3 and AAC though.
  • Video acceleration works only with GStreamer and nvxvimagesink. Mplayer can’t even use XV video output correctly.
  • Tegra3 supports only OpenGL ES 2.0 with EGL, so no full OpenGL with GLX.
  • Xrandr seems to be able to switch the resolution but after the switch there was window decoration corruption.
Despite the deficiencies I think Tegra3 is quite well supported in the X.Org world and many things work well with this 99$ device."
"Playing 1080p H264 while running glmark2-es, an OpenGL ES benchmark. And the CPUFreq ondemand governor doesn’t even raise the CPU frequency from the minimum as everything is properly accelerated."


Now this build is still a bit buggy and risky, but it does open the doors to further development that could open up the true power of the OUYA, and not just some low end gaming device. Keep from messing to much around with your OUYA since it is atleast a great deal easier to brick because it lags the hardware to boot into recovery. 
A button has also been discovered in the final OUYA hardware. Unfortunantly it does not let you boot into anything else but NVIDIA's state, where you can't really do anything without the 128 bit encrypted code. 

torsdag den 4. juli 2013

Running Emulators on the OUYA


Seeing that a lot of people are taking their first steps into the world of Android with the low end gaming console OUYA, i thought that a rough guide to emulation on the Android OS is in order. Since the OUYA does not have access to the Google Play store you will need to sideload the emulators and game ROMS. Sideloading is directly installing .apk files, where .apk files is the installation files of a game or application in the Android OS. Like a .exe file on Windows. To sideload you need to first acquire the .apk file and place it on a memory stick or card. In case of the OUYA you will need to place the files on a USB memory stick.


What follows is a short list of links to the most popular emulators:
Note that there are usually more than one emulator for a platform. Try them out to see what works best for you. There is also some emulators for Android in the OUYA store.

Nintendo 64:

N64Droid

N64Oid 2.7

Games


Playstation 1:

psx4droid[3.0.5]

FPse [0.10.45]

Games


Super Nintendo Entertainment System (SNES):


SEGA Genesis / SEGA Megadrive:


Gameboy Advance:


The files is in Zip and RAR format and needs to be unpacked on your PC first. Then transfer the .apk files to your USB memory. For the games. All the Emulators i have tried out works just fine with Zip files, so in most cases you will not need to unpack the games themselves. 

Unzip the file browser .apk and transfer it to your USB storage. 
(For ease of future transfers you could also include this "Airdroid" .apk that will let you connect to your OUYA wirelessly from your PC browser)

By now you should have your emulators in .apk format and your games on your USB storage device, Plug it into the back of your OUYA. 

Now thanks to OUYA coming down with the walled garden Apple fever, accessing your own files is all of the sudden a bit tricky. On your OUYA. Go to the main menu, then navigate to the "make"section, then "software"  And then open the "browser". Now this is basically just a web browser with OUYA's own page set as a start page. That is your way out of the walled garden OUYA has set up.

When you are in the browser. Press "Y" on your controller. And enter the following URL:

http://bit.ly/13SJxOB

i have used bit.ly because the "real" URL is: http://gdown.baidu.com/data/wisegame/86f47585c4eed74f/ESFileExplorer.apk

Which will give you a bad day trying to enter with a controller.

Your OUYA will then download the ES File Explorer application to the internal memory.

Once finished. Navigate back to the main menu. Go to "Manage", "System", "Advanced"

This will bring you to the standard Android menu.

Scroll down to "Storage" then select "Downloads"

Up comes a list of the files you have downloaded. On that list should be the ES File Explorer .apk file.

Select it and press the "O" button. And choose install.

Once finished you will now have access to not only your own files but also the content of your USB storage from the ES File Explorer application.

Navigate back to the main menu. Then "Make" and in the "Software section" next to the browser. You should now have a icon for the ES File Manager.

Now i will not be doing a tutorial in how to use the ES File Manager or setup each of the emulators to work with the OUYA controller. But it does work and both using ES File Explorer to copy your game ROMS over to the internal memory of the OUYA, and setting up the emulators is pretty self explanatory and straight forward. 

First press "O" on the different Emulator .apk files to install them.

Next, copy over your game ROM files to the OUYA's internal memory. Note: Keep the game ROMs separated in a folder for each gaming system you want to emulate.

You can either create a folder on your OUYA or just copy the game ROMs to the "Downloads" folder. in each of the Emulators you will use its internal file explorer to navigate to the ROM directory and it will save where you have pointed it to.

Next go into the settings of your emulator and keymap the different buttons to your liking on your OUYA controller.

Thats it. your $99 US ARM device can now play 20+ year old games.

Update: Seems that some emulators is not able to be installed and will present a "parsing" error. 

onsdag den 3. juli 2013

OUYA, Root & ROMS


For some reason i was really surprised at the userbase that have gathered around the OUYA game console.

When i first saw that the crowdfunding had exploded i had high expectations as well as being a bit surprised as to why so many people was going insane for what seemed to be sort of the specs for a lot of other Android devices. My expectations was high because i for some reason thought that it was the massive developing community that had casts its love and attention on the OUYA.

It turns out that most backers and buyers are people looking for the low end console and not the veteran Android users i thought it would be. There are nothing wrong with that. And the veterans are there, no doubt about it, and so are a part of the developing community as it is the case with most Android devices. But i was surprised at seeing questions fell way below what the average Android user can come up with. And if you are new the Android world, then surely you have no knowledge about the Android enviroment. Why would you?

For some reason a lot of people is almost suprised to learn that the OUYA is running straight up Android. They seem to think that OUYA has build their very own operating system. Of course that is not the case. OUYA is running Android Jelly Bean, with a VERY limiting user interface overlay of their own.

They require a credit from the latest firmware to even log in. There is no Play store access, which would open up for a flood of different ways that the OUYA could be used, not to say the numerous games that could be mapped to use with the awesome OUYA controller.


For users that want to get more out of their OUYA device and that are new to the Android scene. There is a bit more work, and also learning in altering your Device. If you like how the OUYA looks, works and runs then you are all set. If you would like to use the device for more or simply just something else than just playing games. You need to fiddle and read and search and learn. Jailbreaking on IOS has always stood out as a joke to me. On one hand, i can see how just opening an application and pressing the "Jailbreak" button and then wait, is nice and easy. On the other hand, if even the slightest thing goes wrong, then people jailbreaking will not have the slightest idea of what, why and how to fix it. On Android. There are many ways to gain root access to devices, and a lot even comes as a one-click function.

But Android is by nature so open that for you to need root access you really need to want to shake things up or you want to use applications that require root access. Once you have obtained root access, you can then flash ROM's that is tweaked and optimized version of Android.

In order to flash a ROM, you need root access, and imo have CWM recovery installed. The ClockWorkMod Recovery is a state of recovery you can boot into in order to recover, backup, update, clear system cache and other good stuff. Usually you can boot into this state using a combination of pressed down hardware buttons that differs from device to device, and some even have a dedicated "recovery" button. For some reason OUYA did not really feel like adding this feature. How open is that?
In their defense there are not many locked aspects to find in their device. So it will not matter to much.

Luckily there are other ways to squeeze some custom ROM's into the OUYA. And that is Fastboot. Fastbooting is using the ability to connect your PC with your device and executing a protocol if you have root access.

The OUYA has only just reached retail in the last week, and today the first real custom ROM hits XDA. The ZG BETA v0.0.1 Although there have been a few modified stock ROMS available for some time

You will need to be rooted and have clockworkmod recovery installed first.

Unfortunately, the method for obtaining root access, and thereby superuser privileges, is not a one-click. Not yet anyway. So you will have to get your hands dirty and fiddle around a bit. On the plus side. You will learn a lot, and there is always a great community of elitist assholes on XDA to ask for help.

i love that place.

onsdag den 19. juni 2013

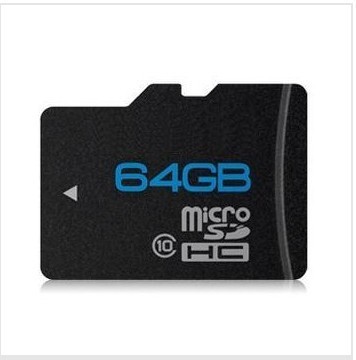
64 GB Micro SD Card .. $15 US


Now i have not received my memory cards yet, but usually the top purchased products on aliexpress is not fake. A single comment states that it is Class 6 and not 10. But even so. 15$ for 64 GB is still a pretty good deal for the most average use for a Micro SD card.

If you plan on using as memory for your Raspberry Pi. Don't. Class 10 makes a great difference in speed, and every bit of speed is needed for the little 600 MHz Raspi.


Update: The card is 64 GB.  However the R/W speed is Class 3, and the memory is poorly build. Using it for system or important files is NOT recommended.


Via Aliexpress

lørdag den 15. juni 2013

Onion Pi(e)


The Onion Pi is a WIFI access point that directs all your traffic through 3 layers of anonymizing Tor network.
follow the turotial here:

http://learn.adafruit.com/onion-pi?view=all

or skip some steps and buy a plug and play Onion Pi:

https://www.adafruit.com/products/1406

onsdag den 15. maj 2013

Build your own Pirate Box Darknet Network for less than 40$


A PirateBox is a self-contained mobile communication and file sharing device. Simply turn it on to transform any space into a free and open communications and file sharing network in the spirit of open source and sharing. The network is closed meaning that all devices connected can only discover, connect and interact with other devices connected to it. For dorms, schools or in your local library or favorite café. 

The meshnet allows the connected users to chat and share files over the closed network within the limited range it provides. The device is also really cheap and fairly easy to set up. It has a really low power consumption, meaning you should get days worth of up time on a single charged external battery charger power bank.


You will need the tiny TP-Link TL-WR703N router 
You will need to flash the router with OpenWRT
You will need to power it with something like this 5V 2000mAh external battery charger power bank
You will need a USB stick. 

On Android there is an app to access the darknet

On your IOS device, in the WIFI network selection select piratebox, and access its options by pressing the blue arrow. Disable "Auto Join" and "Auto Login". You should now be able to access your Piratebox in Safari.

When you have acquired all the parts for your very own darknet server, follow this tutorial:


Note: To SSH/Telnet into a device in Windows, use PuTTY


1. First download a custom copy of OpenWrt for the MR3020 (modified by Matthias Strubel to include all needed kernel-modules). See this thread on the forum for more info. For the WR703N, download this OpenWrt firmware

2. Set the toggle switch located beside the LAN/WAN port to WISP mode

3. Turn off your laptop’s wireless (in OSX, click on the wifi icon and select “Turn Wi-Fi Off”)

4. Connect the router via ethernet cable to your computer and open a web browser to http://192.168.0.254 (for the MR3020) or http://192.168.1.1 (for the WR703N)

5. Enter the default username & password (admin & admin)

6. Navigate to System Tools > Firmware Upgrade and select the OpenWRT firmware

(Note: The WR703N firmware text is in Chinese. To flash OpenWrt from the web interface, select the last menu item on the left, and then the third submenu item. More info in this Village Telco post).

7. After the upgrade completes, the system will restart

8. Telnet to the device:
telnet 192.168.1.1


9. Use the passwd command to set your login password – this will enable SSH:
passwd


10. Edit the network file with vi (vi cheat sheet):

NOTE: The following instructions assume your gateway router’s (home router’s) IP address is 192.168.2.1. If your gateway router differs from this, you will need to modify your network file accordingly. Keep in mind that your OpenWrt (PirateBox) router should not have the same address as your gateway router though it will need to be on the same subnet in order to access and download files from the Internet.
vi /etc/config/network


The modified file should look like this:
config interface 'loopback' option ifname 'lo' option proto 'static' option ipaddr '127.0.0.1' option netmask '255.0.0.0' config interface 'lan' option ifname 'eth0' option type 'bridge' option proto 'static' option ipaddr '192.168.2.111' option netmask '255.255.255.0' option gateway '192.168.2.1' list dns '192.168.2.1' list dns '8.8.8.8'


11. Remove the power from the router.

12. Turn ON your laptop’s wireless (for OSX, click on the wifi icon and select “Turn Wi-Fi On”)

13. Connect the MR3020 (or WR703N) to your gateway router (e.g. your home network router) with an ethernet cable and plug the power back in. Wait a couple of minutes until the router boots up. With your computer connected to your home network, try sshing into the router (Note: use the “ipaddr” you assigned in step 9):
ssh root@192.168.2.111


14. Ping google to ensure your firewall settings are correct:
ping google.com


15. Add USB support to OpenWrt by installing and enabling the following packages (Note: this step is not required if you used the customized OpenWrt image from step 1):
opkg update opkg install kmod-usb-uhci insmod usbcore ## may return: file exists insmod uhci opkg install kmod-usb-ohci ## may return: up to date. insmod usb-ohci

Install PirateBox

Next you’ll need to install PirateBox on the router.

1. Connect your USB drive (formatted to FAT32 with only one partition) to the USB port.

2. Install the mkPirateBox package by issuing the following commands.
cd /tmp opkg update && opkg install http://piratebox.aod-rpg.de/piratebox_0.6.3_all.ipk


3. Optional: Install the Kareha Image Board:
/opt/piratebox/bin/timesave.sh /opt/piratebox/conf/piratebox.conf install /opt/piratebox/bin/install_piratebox.sh /opt/piratebox/conf/piratebox.conf imageboard


Afterwards, edit the Kareha image board config file to change the admin username and password (ADMIN_PASS and SECRET):
vi /opt/piratebox/www/board/config.pl


4. Once the install is completed, unplug the ethernet cable and disconnect the power for at least 10 seconds.

5. Restart the device and join the “PirateBox – Share Freely” network. Open any web page and you should be redirected to the PirateBox menu.

6. Begin sharing files and chatting!


This tutorial was copy pasted from David Darts